
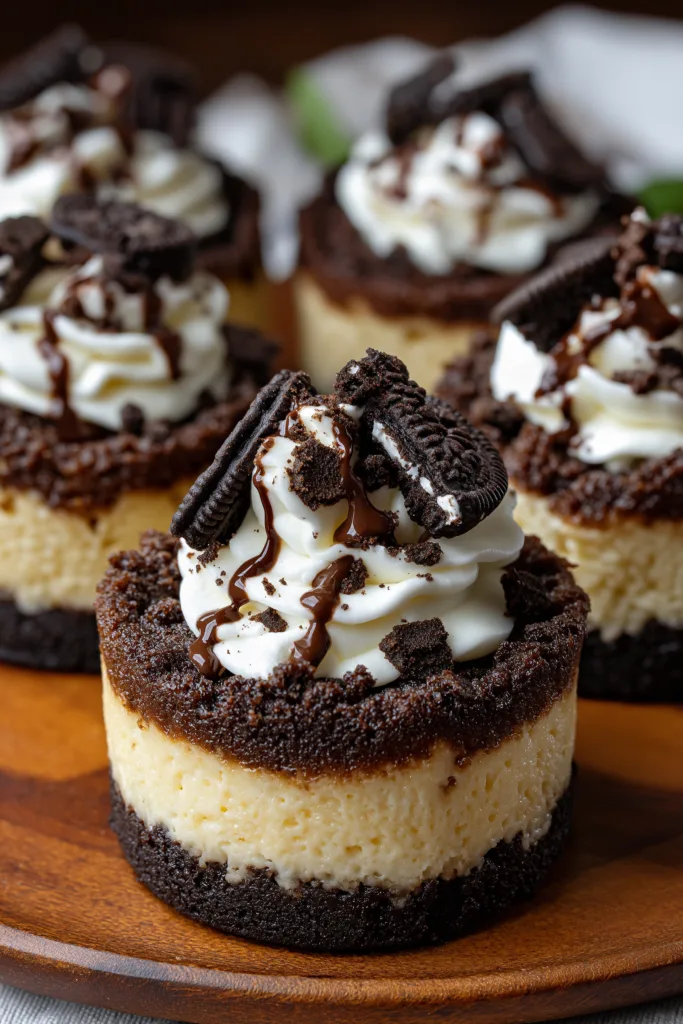
No-Bake Oreo Cheesecake Cups are the kind of dessert that instantly wins everyone over. Rich, creamy, and packed with irresistible chocolate cookie flavor, these individual treats combine a buttery Oreo crust with a light and fluffy cheesecake filling that melts in your mouth. Whether you’re planning a family gathering, celebrating a birthday, or simply craving something sweet without turning on the oven, this recipe delivers every single time. I still remember making these on a hot summer afternoon when the last thing I wanted was a warm kitchen. One bite, and everyone asked for seconds. Let’s dive into this incredibly easy recipe that’s sure to become one of your favorite desserts.
Love discovering easy homemade desserts like this? Subscribe to our email newsletter and receive delicious recipes, baking tips, seasonal favorites, and exclusive kitchen inspiration delivered straight to your inbox. Never miss your next family-favorite recipe.
What Are No-Bake Oreo Cheesecake Cups?
No-Bake Oreo Cheesecake Cups are individual desserts made with three irresistible layers: a crunchy Oreo cookie crust, a silky smooth no-bake cheesecake filling, and a generous topping of whipped cream and crushed Oreo cookies. Unlike traditional baked cheesecakes, these require no oven, making them perfect for warm weather, busy schedules, or beginner bakers.
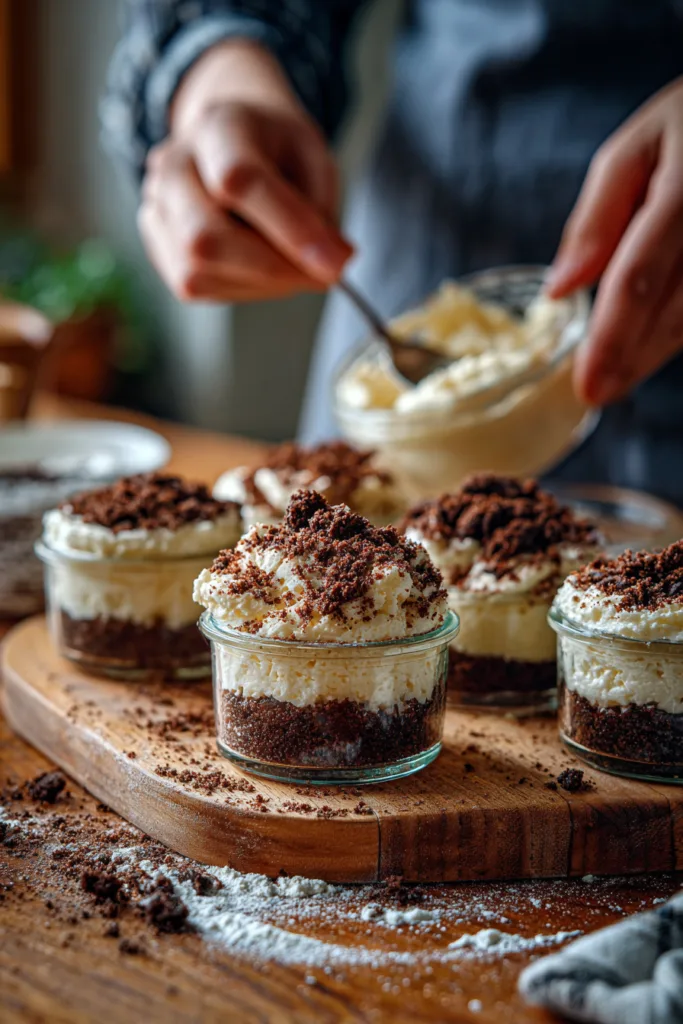
Each serving is perfectly portioned, easy to prepare ahead of time, and beautifully presented in small dessert cups or jars. The contrast between the crunchy cookie base and the creamy cheesecake creates a dessert that’s both satisfying and refreshing.
They’re also incredibly versatile. You can dress them up with chocolate syrup, mini Oreo cookies, fresh berries, caramel sauce, or even a sprinkle of chocolate shavings for special occasions.
Why You’ll Love These No-Bake Oreo Cheesecake Cups
There are countless reasons this recipe has become one of my favorite no-bake desserts.
- No oven required, making it perfect for summer.
- Ready with simple pantry ingredients.
- Rich, creamy, and loaded with real Oreo flavor.
- Great for parties, birthdays, picnics, and holidays.
- Easy enough for beginner bakers.
- Individual servings make entertaining effortless.
- Can be prepared a day in advance.
- Easy to customize with different toppings.
- Kid-friendly and always a crowd favorite.
- Beautiful presentation with very little effort.
Honestly, this is one of those desserts that looks like it came from a bakery but takes surprisingly little work. Every spoonful delivers creamy cheesecake, crunchy cookies, and just the right amount of sweetness.
What Do No-Bake Oreo Cheesecake Cups Taste Like?
Imagine taking the best bite of a classic Oreo cheesecake and turning it into an individual dessert.
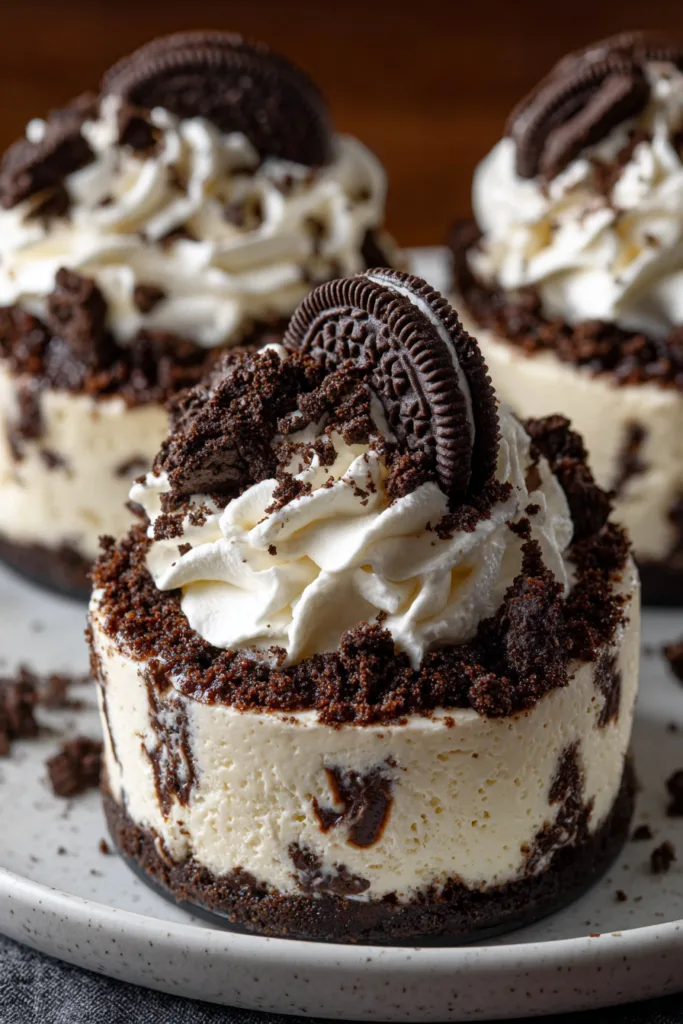
The crust is buttery, chocolatey, and slightly crunchy. Then comes the cheesecake filling—light, fluffy, smooth, and incredibly creamy with delicate hints of vanilla. Folded throughout the filling are chunks of crushed Oreo cookies that add little bursts of chocolate crunch in every bite.
Top everything with fresh whipped cream, extra crushed Oreos, and a drizzle of chocolate syrup, and each spoonful becomes rich without feeling too heavy. The chilled texture makes these cheesecake cups especially refreshing after dinner or on warm afternoons.
One of my favorite things is how the Oreo crust softens just enough after chilling while still keeping a slight crunch. That contrast in texture is what makes this dessert completely irresistible.
Benefits of Making No-Bake Oreo Cheesecake Cups
Beyond their incredible flavor, these No-Bake Oreo Cheesecake Cups offer plenty of practical advantages that make them a go-to dessert for almost any occasion.
No Baking Required
One of the biggest advantages is right in the name—there’s absolutely no baking involved. That means you don’t have to worry about water baths, cracked cheesecakes, or overheating your kitchen. Simply mix, layer, chill, and enjoy.
Perfect for Make-Ahead Entertaining
If you’re hosting a party, preparing for a holiday dinner, or planning a family gathering, these cheesecake cups are a lifesaver. You can make them the night before, leaving you with one less thing to worry about on the big day.
Easy Portion Control
Serving desserts individually makes entertaining much simpler. Everyone gets their own perfectly layered cheesecake cup, and there’s no slicing or serving required.
Beginner-Friendly Recipe
Even if you’ve never made cheesecake before, this recipe is easy to follow. The ingredients are straightforward, and the steps are simple enough for anyone to master on the first try.
Great for Customizing
One of the reasons I keep coming back to this recipe is how easy it is to personalize. You can create endless variations depending on the occasion or your family’s preferences.
Popular topping ideas include:
- Chocolate curls
- Caramel drizzle
- Fresh strawberries
- Fresh raspberries
- Chopped peanuts
- Mini chocolate chips
- Peanut butter drizzle
- White chocolate shavings
- Cookie crumbs
- Chocolate sprinkles
Every version feels like a brand-new dessert while keeping that classic Oreo cheesecake flavor everyone loves.
Ingredients You’ll Need
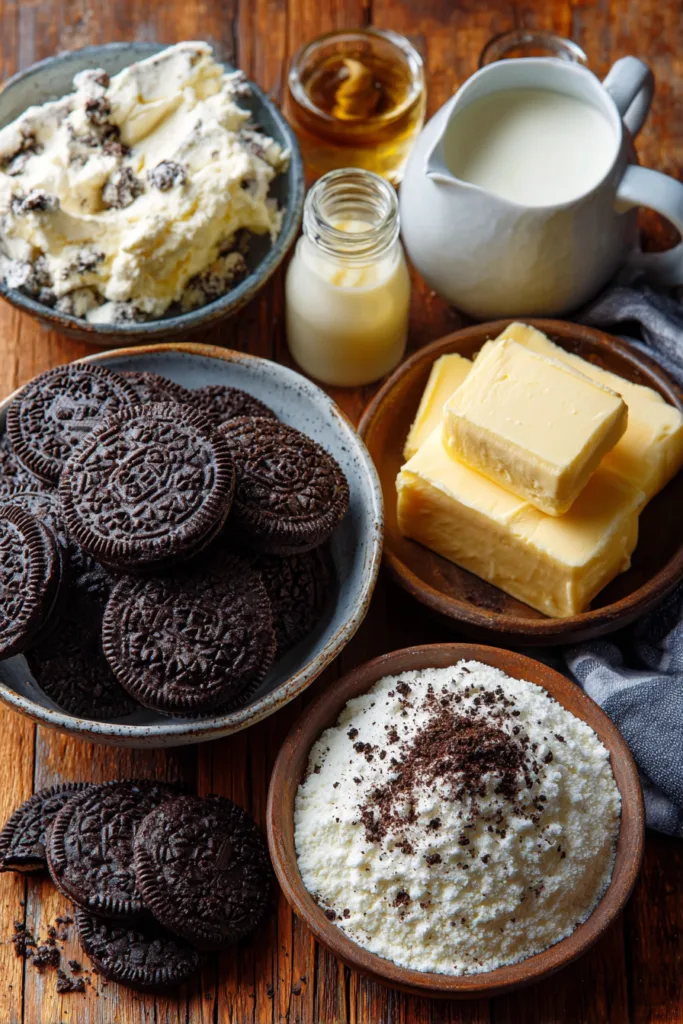
The beauty of these No-Bake Oreo Cheesecake Cups is that they use simple, everyday ingredients that come together to create an incredibly rich and creamy dessert.
| Ingredient | Amount | Purpose |
|---|---|---|
| Oreo cookies, crushed | 24 cookies | Crunchy chocolate crust |
| Unsalted butter, melted | 5 tablespoons | Holds the crust together |
| Cream cheese, softened | 16 oz (450 g) | Creates the creamy cheesecake base |
| Heavy whipping cream | 1 cup | Makes the filling light and fluffy |
| Powdered sugar | ½ cup | Sweetens the filling smoothly |
| Vanilla extract | 1 teaspoon | Enhances the cheesecake flavor |
| Oreo cookies, roughly crushed | 10 cookies | Mixed into the filling for texture |
| Whipped cream | For topping | Adds a light finishing touch |
| Crushed Oreo cookies | 4 cookies | Decorative topping |
| Mini Oreo cookies (optional) | As desired | Garnish |
| Chocolate syrup (optional) | As desired | Extra chocolate flavor |
Ingredient Tips
A few small details make a big difference.
- Always use full-fat cream cheese for the richest texture.
- Let the cream cheese soften at room temperature before mixing to prevent lumps.
- Whip the heavy cream until stiff peaks form for the fluffiest filling.
- Use regular Oreo cookies rather than double-stuffed varieties for the best crust consistency.
- Chill the dessert long enough so the filling becomes perfectly firm and creamy.
These simple ingredients work together to create a dessert that’s rich, smooth, and packed with cookies-and-cream goodness.
Kitchen Tools You’ll Need
You don’t need any fancy equipment to make these No-Bake Oreo Cheesecake Cups. In fact, most of the tools are probably already in your kitchen.
| Tool | Why It’s Needed |
|---|---|
| Mixing bowls | For preparing the crust and filling |
| Electric hand mixer or stand mixer | To beat the cream cheese until smooth |
| Separate mixing bowl | For whipping the heavy cream |
| Rubber spatula | To gently fold the whipped cream into the filling |
| Measuring cups and spoons | For accurate measurements |
| Food processor or rolling pin | To crush the Oreo cookies |
| Serving cups or dessert glasses | For assembling individual portions |
| Spoon or piping bag | To neatly fill each dessert cup |
| Refrigerator | To chill and set the cheesecake |
If you want a bakery-style presentation, pipe the cheesecake filling into the cups using a large piping bag fitted with a star tip. It creates beautiful layers with almost no extra effort.
Ingredient Additions and Easy Substitutions
One of my favorite things about these No-Bake Oreo Cheesecake Cups is how adaptable they are. Once you’ve mastered the classic version, it’s easy to experiment with different flavors and toppings.
Delicious Additions
Want to make these cheesecake cups even more indulgent? Try adding one or more of these mix-ins:
- Mini chocolate chips
- White chocolate chips
- Chopped chocolate bars
- Chocolate curls
- Crushed chocolate sandwich cookies
- Toasted coconut flakes
- Chopped pecans
- Chopped walnuts
- Peanut butter drizzle
- Salted caramel sauce
- Espresso powder for a mocha twist
- Fresh raspberries
- Sliced strawberries
- Chopped bananas
Ingredient Substitutions
Need to adjust the recipe based on what you have on hand? Here are some easy swaps that still deliver delicious results.
| Original Ingredient | Substitute |
|---|---|
| Oreo cookies | Chocolate sandwich cookies |
| Unsalted butter | Salted butter (reduce added salt if using) |
| Heavy whipping cream | Heavy cream |
| Vanilla extract | Vanilla bean paste |
| Powdered sugar | Confectioners’ sugar |
| Cream cheese | Reduced-fat cream cheese (texture will be slightly lighter) |
| Chocolate syrup | Hot fudge sauce or caramel sauce |
If you’re making these for a celebration, try layering the filling with chopped brownies, chocolate cake cubes, or even chocolate pudding for an extra decadent dessert.
How to Make No-Bake Oreo Cheesecake Cups
This recipe comes together in a few simple steps. Once everything is assembled, the refrigerator does the rest of the work.
Step 1: Prepare the Oreo Crust
Place the Oreo cookies in a food processor and pulse until they become fine crumbs. If you don’t have a food processor, seal the cookies in a zip-top bag and crush them with a rolling pin.
Transfer the crumbs to a mixing bowl, pour in the melted butter, and stir until every crumb is evenly coated.
Divide the mixture among eight serving cups, pressing it down gently with the back of a spoon to form an even crust.
Place the cups in the refrigerator for about 10 minutes while you prepare the filling.
Step 2: Make the Cheesecake Filling
In a large mixing bowl, beat the softened cream cheese until it’s completely smooth and creamy.
Add the powdered sugar and vanilla extract, then continue mixing until everything is fully combined and silky.
In a separate bowl, whip the heavy cream until stiff peaks form.
Using a rubber spatula, gently fold the whipped cream into the cream cheese mixture. Take your time here—folding instead of stirring helps keep the filling light and airy.
Finally, fold in the roughly crushed Oreo cookies until they’re evenly distributed throughout the filling.
Step 3: Assemble the Cheesecake Cups
Remove the chilled crusts from the refrigerator.
Spoon or pipe the cheesecake filling evenly over each Oreo crust, smoothing the tops with the back of a spoon if needed.
Cover the cups and refrigerate for at least 4 hours, or overnight for the best texture and flavor.
Step 4: Decorate and Serve
Just before serving, top each cheesecake cup with a swirl of whipped cream, a sprinkle of crushed Oreo cookies, a mini Oreo cookie if desired, and a drizzle of chocolate syrup for the ultimate finishing touch.
Serve chilled and enjoy every creamy, crunchy, chocolatey bite.
What to Serve with No-Bake Oreo Cheesecake Cups
These No-Bake Oreo Cheesecake Cups are wonderfully rich on their own, but pairing them with the right drinks or light accompaniments can make dessert feel even more special.
Delicious Drink Pairings
The creamy cheesecake filling and chocolate cookie flavor pair beautifully with a variety of beverages.
- Freshly brewed coffee
- Espresso
- Cappuccino
- Hot chocolate
- Cold brew coffee
- Iced latte
- Chilled milk
- Vanilla milkshake
- Chocolate milk
- Fresh berry smoothie
If you’re serving these after dinner, a hot cup of coffee balances the sweetness perfectly. For summer gatherings, an iced latte or a cold glass of milk is just as satisfying.
Desserts That Pair Well
Planning a dessert table? These cheesecake cups fit right in alongside other bite-sized treats.
- Fresh strawberries
- Mixed berries
- Chocolate-covered strawberries
- Brownie bites
- Chocolate truffles
- Mini cupcakes
- Vanilla wafers
- Fruit skewers
- Chocolate-dipped pretzels
The combination of creamy cheesecake and fresh fruit is especially refreshing, adding a nice contrast to the richness of the dessert.
Expert Tips for the Best No-Bake Oreo Cheesecake Cups
I’ve made these cheesecake cups more times than I can count, and a few simple tricks always make a noticeable difference.
Use Room-Temperature Cream Cheese
Cold cream cheese doesn’t blend smoothly and often leaves small lumps in the filling. Let it sit at room temperature for about 30 to 45 minutes before mixing.
Whip the Cream Properly
Heavy whipping cream should reach stiff peaks before folding it into the cheesecake mixture. This creates a light, airy texture that holds its shape beautifully.
Fold, Don’t Stir
When combining the whipped cream with the cream cheese mixture, use gentle folding motions. Stirring too vigorously can knock out the air, making the filling denser.
Chill Long Enough
Patience really pays off here. Although four hours is the minimum chilling time, leaving the cheesecake cups overnight gives them an even creamier texture and allows the flavors to develop.
Add Toppings Before Serving
Whipped cream and crushed Oreo cookies stay fresher and more attractive when added just before serving. This keeps the toppings crisp and prevents them from becoming soggy.
Make Clean Layers
If you’re using clear dessert glasses, piping the filling instead of spooning it in creates neat, professional-looking layers that are perfect for parties or holidays.
Storage Instructions
One of the best things about these No-Bake Oreo Cheesecake Cups is how well they store, making them an excellent make-ahead dessert.
| Storage Method | Time |
|---|---|
| Refrigerator | Up to 4 days |
| Freezer | Up to 2 months |
| Room Temperature | No more than 2 hours |
Refrigerating
Cover each dessert cup tightly with plastic wrap or an airtight lid and store it in the refrigerator. The cheesecake stays creamy and delicious for up to four days.
Freezing
For longer storage, freeze the cheesecake cups without the whipped cream topping. Wrap each cup securely to prevent freezer burn.
When you’re ready to enjoy them, thaw overnight in the refrigerator before decorating with fresh whipped cream and Oreo toppings.
Can You Make Them Ahead?
Absolutely. In fact, these cheesecake cups taste even better after they’ve chilled overnight. The flavors blend together beautifully, and the filling becomes perfectly firm and velvety. That’s why they’re one of my favorite desserts to prepare a day before entertaining guests.
Recipe Information
| Detail | Information |
|---|---|
| Recipe Name | No-Bake Oreo Cheesecake Cups |
| Prep Time | 25 minutes |
| Chill Time | 4 hours |
| Total Time | 4 hours 25 minutes |
| Servings | 8 dessert cups |
| Difficulty | Easy |
| Cuisine | American |
| Course | Dessert |
| Method | No-Bake |
Nutritional Information
The following nutritional values are approximate and may vary depending on the specific brands of ingredients used and the size of each serving.
| Nutrient | Per Serving |
|---|---|
| Calories | 485 kcal |
| Protein | 5 g |
| Carbohydrates | 36 g |
| Fat | 36 g |
| Saturated Fat | 22 g |
| Fiber | 1 g |
| Sugar | 24 g |
| Sodium | 320 mg |
These No-Bake Oreo Cheesecake Cups are an indulgent dessert that’s perfect for celebrations, holidays, or whenever you’re craving something sweet and creamy. Enjoy them as an occasional treat alongside a balanced diet.
Frequently Asked Questions
Can I make No-Bake Oreo Cheesecake Cups ahead of time?
Absolutely! In fact, they’re even better when made in advance. Preparing them the night before allows the filling to firm up and gives the flavors time to blend together beautifully.
How long do Oreo Cheesecake Cups need to chill?
For the best texture, chill them for at least 4 hours. If you have the time, letting them rest overnight will produce an even creamier and more stable dessert.
Can I freeze these cheesecake cups?
Yes. Freeze the cheesecake cups without the whipped cream topping for up to 2 months. Thaw them overnight in the refrigerator before decorating and serving.
Do I have to use Oreo cookies?
Not at all. While classic Oreo cookies provide the signature cookies-and-cream flavor, other chocolate sandwich cookies work well too.
Can I use store-bought whipped topping?
Yes. Homemade whipped cream creates the lightest texture, but store-bought whipped topping is a convenient alternative if you’re short on time.
Why is my cheesecake filling too soft?
This usually happens if the heavy cream wasn’t whipped to stiff peaks or if the dessert hasn’t chilled long enough. Be sure to whip the cream properly and refrigerate the cups for at least 4 hours.
Can I make this recipe gluten-free?
Yes. Simply use gluten-free chocolate sandwich cookies in place of regular Oreo cookies and double-check that your remaining ingredients are certified gluten-free if needed.
Can I add other flavors to the filling?
Definitely. Try mixing in a little peppermint extract during the holidays, espresso powder for a mocha version, or a swirl of peanut butter or caramel for a fun twist.
Conclusion
These No-Bake Oreo Cheesecake Cups prove that an impressive dessert doesn’t have to be complicated. With a crunchy chocolate cookie crust, a rich and fluffy cheesecake filling, and plenty of Oreo goodness in every bite, they’re guaranteed to become a favorite for family dinners, birthday parties, potlucks, and holiday celebrations.
I love how effortlessly this recipe comes together. There’s no oven to preheat, no complicated techniques to master, and no stressful last-minute preparation. Just mix, layer, chill, and enjoy. It’s the kind of dessert that looks elegant enough for guests but is simple enough to make on a weekday just because you’re craving something sweet.
Once you’ve made these creamy cheesecake cups, don’t be surprised if they’re requested again and again. They’re easy to customize, perfect for making ahead, and always disappear quickly from the dessert table.
If you try this recipe, I’d love to hear how it turned out. Leave a review below, share your favorite topping combinations, and let us know if you added your own creative twist.
Print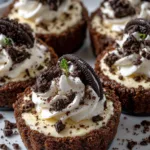
No-Bake Oreo Cheesecake Cups
- Total Time: 4 hrs 25 mins
- Yield: 8 dessert cups
- Diet: Vegetarian
Description
Creamy No-Bake Oreo Cheesecake Cups with a buttery Oreo crust and fluffy cookies-and-cream filling. These easy individual desserts are perfect for parties, holidays, or whenever you’re craving a rich no-bake treat.
Ingredients
24 Oreo cookies, crushed
5 tbsp unsalted butter, melted
16 oz (450 g) cream cheese, softened
1 cup heavy whipping cream
1/2 cup powdered sugar
1 tsp vanilla extract
10 Oreo cookies, roughly crushed
Whipped cream, for topping
4 Oreo cookies, crushed (for topping)
Mini Oreo cookies (optional)
Chocolate syrup (optional)
Instructions
1. In a medium bowl, combine the crushed Oreo cookies with the melted butter until evenly coated.
2. Divide the mixture among 8 serving cups and press firmly into the bottom to form the crust. Chill for 10 minutes.
3. In a large mixing bowl, beat the softened cream cheese until smooth and creamy.
4. Mix in the powdered sugar and vanilla extract until fully combined.
5. In a separate bowl, whip the heavy cream until stiff peaks form.
6. Gently fold the whipped cream into the cream cheese mixture until light and fluffy.
7. Fold in the roughly crushed Oreo cookies.
8. Spoon or pipe the cheesecake filling evenly over the chilled crusts.
9. Refrigerate for at least 4 hours or until fully set.
10. Top with whipped cream, crushed Oreos, mini Oreo cookies, and a drizzle of chocolate syrup before serving if desired.
Notes
Allow the cream cheese to reach room temperature for the smoothest filling.
For the best texture, chill the cheesecake cups overnight before serving.
Decorate with toppings just before serving to keep them fresh and crisp.
Store covered in the refrigerator for up to 4 days or freeze without toppings for up to 2 months.
- Prep Time: 25 mins
- Cook Time: 0 mins
- Category: Dessert
- Method: No-Bake
- Cuisine: American