

Frozen Cheesecake Pops are the kind of dessert that instantly makes people smile. Creamy, velvety cheesecake wrapped in a crisp white chocolate shell and finished with colorful toppings—what’s not to love? They’re cool, rich, and just sweet enough to satisfy every craving without feeling overly heavy. I still remember making my first batch on a hot summer afternoon when turning on the oven felt impossible. One bite, and everyone reached for another. Since then, these frozen treats have become a staple for birthdays, backyard barbecues, and lazy weekends. Whether you’re planning a party or simply treating yourself, this easy recipe is bound to become one of your favorite no-bake desserts.
If you enjoy discovering easy homemade desserts like this one, subscribe to our email newsletter. You’ll receive new recipes, baking tips, seasonal favorites, and exclusive kitchen inspiration delivered straight to your inbox so you’ll never run out of delicious ideas.
Why You’ll Love These Frozen Cheesecake Pops
Some desserts look impressive but take hours to prepare. These Frozen Cheesecake Pops are different. They deliver bakery-quality results with surprisingly little effort.
The creamy cheesecake center freezes beautifully without becoming icy, while the white chocolate coating adds the perfect snap with every bite. Add your favorite toppings, and every pop becomes unique.
Whether you’re serving kids, adults, or both, these frozen treats disappear fast.
Here are just a few reasons you’ll love them:
| Feature | Why It Matters |
|---|---|
| No baking required | Perfect for warm weather |
| Easy to customize | Endless topping combinations |
| Make ahead | Great for parties and holidays |
| Individual portions | Easy serving and less mess |
| Rich cheesecake flavor | Tastes like frozen cheesecake on a stick |
| Beginner friendly | Simple ingredients and easy steps |
Honestly, they’re one of those desserts that look much more complicated than they actually are.
What Are Frozen Cheesecake Pops?
Frozen Cheesecake Pops are individual portions of creamy no-bake cheesecake shaped into handheld treats. Each pop is frozen until firm, dipped into melted chocolate, and decorated with crunchy or colorful toppings before being enjoyed straight from the freezer.
Think of them as a cross between classic cheesecake, ice cream bars, and chocolate-covered cake pops.
Unlike traditional baked cheesecake, these pops have an incredibly light texture thanks to whipped topping folded into the cream cheese mixture. The result is smooth, airy, and perfectly creamy.
They’re especially popular because they can be made well in advance. Keep a batch in your freezer and you’ll always have a ready-to-serve dessert for unexpected guests or late-night cravings.
The Taste and Texture
Have you ever taken a bite of frozen cheesecake and noticed how creamy it stays even when it’s ice cold?
That’s exactly what makes these pops special.
The filling is:
- Rich without feeling too heavy
- Smooth and creamy
- Slightly tangy from the cream cheese
- Sweet with hints of vanilla
- Refreshing when served frozen
Then comes the white chocolate shell.
It hardens into a delicate coating that cracks beautifully as you bite through it, creating the perfect contrast against the soft cheesecake center.
And the toppings?
That’s where things get really fun.
Crunchy graham cracker crumbs recreate the flavor of classic cheesecake crust.
Crushed Oreos add chocolatey richness.
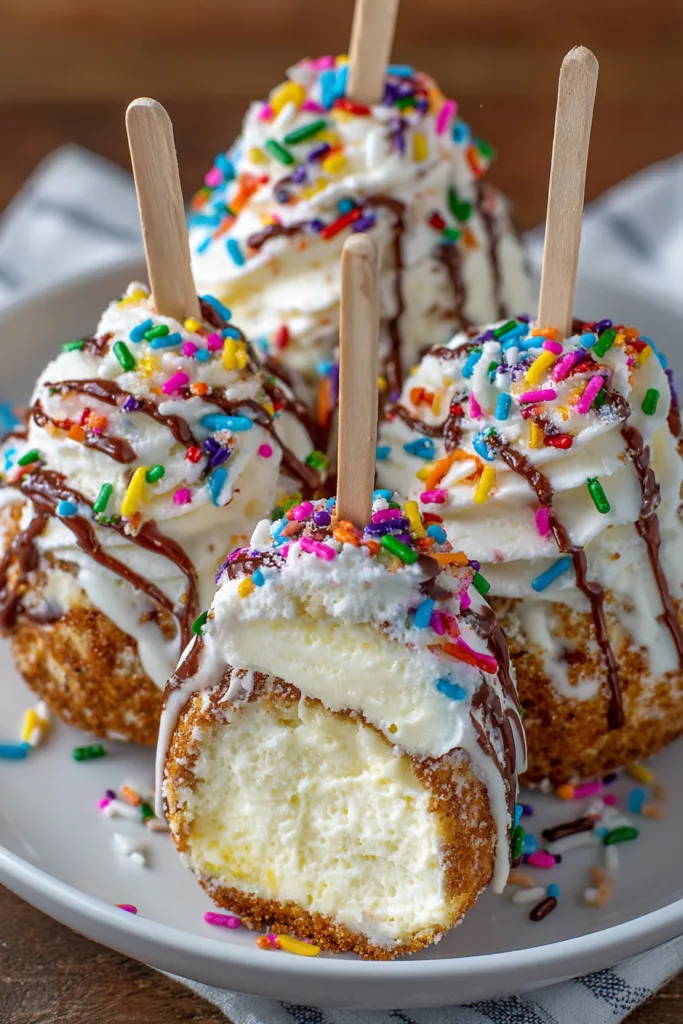
Rainbow sprinkles make them festive.
Freeze-dried strawberries bring a fruity brightness.
Mini chocolate chips and roasted peanuts create even more texture.
Every bite feels just a little different.
Benefits of Making Frozen Cheesecake Pops at Home
Making desserts from scratch isn’t only about saving money.
It’s about creating something exactly the way you like it.
Here are some of the biggest advantages of homemade Frozen Cheesecake Pops.
Easy to Personalize
Everyone likes different flavors.
Instead of making one large cheesecake, you can decorate each pop differently.
Kids love sprinkles.
Chocolate lovers can add cookie crumbs.
Fruit fans might choose strawberry pieces.
Everyone gets their favorite.
Perfect for Every Occasion
These pops fit almost every celebration.
They’re ideal for:
- Birthday parties
- Baby showers
- Summer picnics
- Family gatherings
- Holiday dessert tables
- School celebrations
- Weekend treats
Since they’re individually portioned, serving is incredibly simple.
Great Make-Ahead Dessert
One of my favorite things?
You can prepare these several days before serving.
No last-minute baking.
No decorating right before guests arrive.
Simply remove them from the freezer a minute or two before serving.
Beginner Friendly
You don’t need professional baking skills.
If you can mix cream cheese and melt chocolate, you’re already halfway there.
That’s one reason this recipe has become so popular among home cooks.
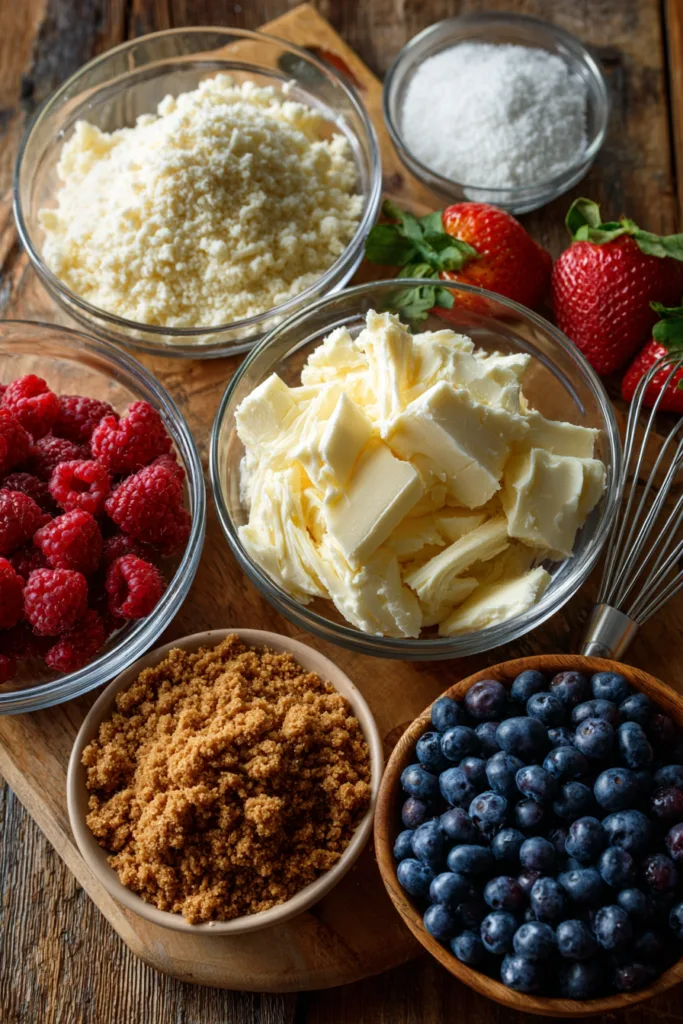
Frozen Cheesecake Pops Ingredients
Quality ingredients make all the difference. Fortunately, every ingredient in this recipe is easy to find at most grocery stores.
Cheesecake Filling
| Ingredient | Amount | Purpose |
|---|---|---|
| Cream cheese, softened | 16 oz (450 g) | Creates the rich cheesecake base |
| Powdered sugar | ½ cup | Sweetens while keeping the filling smooth |
| Vanilla extract | 1 teaspoon | Adds warm flavor |
| Fresh lemon juice (optional) | 1 tablespoon | Brightens the cheesecake flavor |
| Whipped topping | 1 cup | Makes the filling light and fluffy |
White Chocolate Coating
| Ingredient | Amount |
|---|---|
| White chocolate chips | 2 cups |
| Coconut oil | 1 tablespoon |
The coconut oil helps create a silky coating that’s easier for dipping.
Optional Toppings
Mix and match to create your own combinations.
| Topping | Flavor |
|---|---|
| Graham cracker crumbs | Classic cheesecake taste |
| Crushed Oreo cookies | Rich chocolate crunch |
| Rainbow sprinkles | Colorful and festive |
| Chopped roasted peanuts | Nutty crunch |
| Freeze-dried strawberry crumbs | Fruity sweetness |
| Mini chocolate chips | Extra chocolate texture |
There really isn’t a wrong choice here.
Sometimes I even divide the batch into several topping stations and let everyone decorate their own.
It turns dessert into an activity.
Kitchen Tools You’ll Need
One of the best parts about this recipe is that it doesn’t require special equipment.
| Tool | Purpose |
|---|---|
| Large mixing bowl | Mixing the cheesecake filling |
| Electric hand mixer or stand mixer | Beating the cream cheese smoothly |
| Rubber spatula | Folding in whipped topping |
| Measuring cups and spoons | Accurate measurements |
| Cookie scoop or ice cream scoop | Creating even-sized pops |
| Baking tray | Holding pops while freezing |
| Parchment paper | Prevents sticking |
| Microwave-safe bowl | Melting chocolate |
| Popsicle sticks | Easy serving |
| Spoon or spatula | Coating and decorating pops |
If you don’t own a mixer, you can still make the recipe. Just allow the cream cheese to soften completely before mixing by hand to avoid lumps.
Ingredient Additions and Easy Substitutions
One reason I come back to this recipe again and again is how flexible it is.
Here are some easy ways to customize your Frozen Cheesecake Pops.
Swap the Chocolate
Instead of white chocolate, try:
- Milk chocolate
- Dark chocolate
- Ruby chocolate
- Caramel-flavored chocolate
Each creates a completely different dessert.
Change the Flavor
Mix these into the cheesecake filling:
- Strawberry jam
- Lemon zest
- Crushed cookies
- Mini chocolate chips
- Peanut butter
- Caramel sauce
- Espresso powder
- Coconut flakes
Just don’t overmix once you’ve folded in the whipped topping—you’ll want to keep that light, airy texture.
Different Toppings
If you’re feeling creative, try:
- Toasted coconut
- Chopped almonds
- Crushed pistachios
- Cinnamon sugar
- Chocolate drizzle
- Colorful candy pieces
- Cookie butter crumbs
Sometimes the toppings become everyone’s favorite part.
And honestly? That’s half the fun.
How to Make Frozen Cheesecake Pops
Making Frozen Cheesecake Pops is surprisingly simple. The hardest part? Waiting for them to freeze. If you’re anything like me, you’ll be tempted to sneak a spoonful of the cheesecake filling before it ever makes it to the freezer. And honestly, I never judge.
Follow these easy steps for creamy, perfectly coated cheesecake pops every time.
Step 1: Beat the Cream Cheese
Place the softened cream cheese into a large mixing bowl.
Using a hand mixer or stand mixer, beat for about 2–3 minutes until it’s completely smooth and fluffy. Don’t rush this step. A silky cream cheese base means a silky cheesecake filling.
Step 2: Add the Flavor
Add the powdered sugar, vanilla extract, and fresh lemon juice if you’re using it.
Beat again until everything is fully incorporated.
At this stage, the mixture should be creamy and slightly glossy.
Step 3: Fold in the Whipped Topping
Using a rubber spatula, gently fold the whipped topping into the cream cheese mixture.
Avoid stirring too aggressively.
You want to keep as much air in the mixture as possible because that’s what creates the light, mousse-like texture once frozen.
Step 4: Shape the Pops
Line a baking tray or cutting board with parchment paper.
Using a cookie scoop, divide the cheesecake mixture into ten equal portions.
Shape each portion into a thick oval or rounded rectangle.
Don’t worry if they aren’t perfectly identical. Homemade desserts always have a little personality.
Insert one popsicle stick into each pop, pushing it about halfway through.
Step 5: Freeze Until Firm
Transfer the tray to the freezer.
Freeze for at least 2 to 3 hours.
The pops should feel completely solid before dipping them into the melted chocolate.
If they’re even slightly soft, they may slide off the sticks.
Step 6: Melt the Chocolate
Combine the white chocolate chips and coconut oil in a microwave-safe bowl.
Microwave in 20-second intervals.
Stir after every interval until the chocolate becomes smooth and glossy.
Avoid overheating the chocolate because white chocolate burns more easily than dark or milk chocolate.
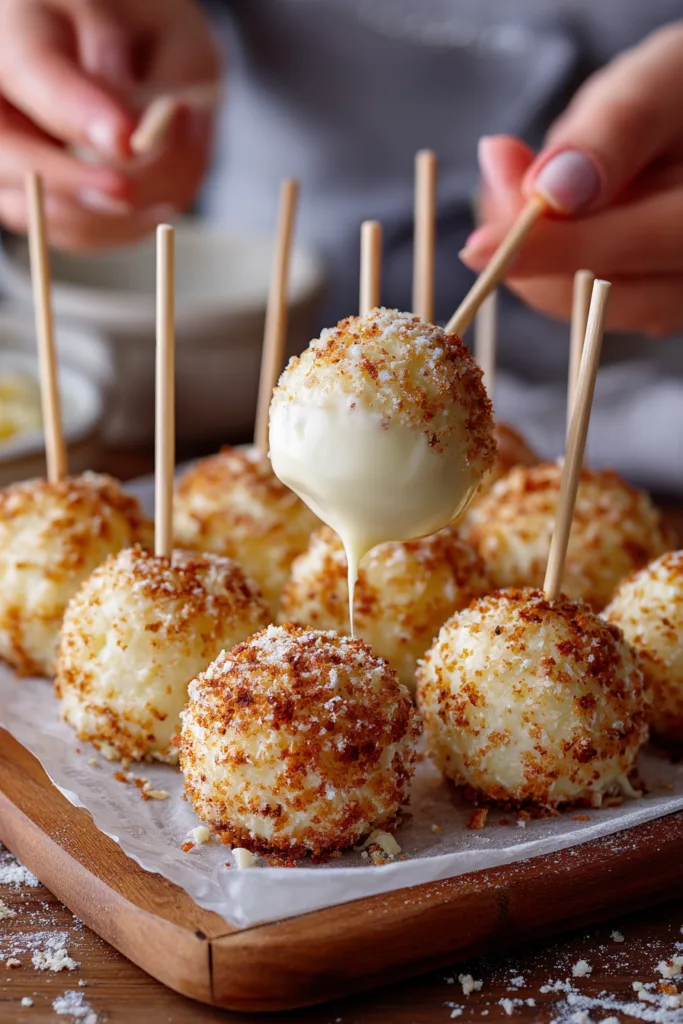
Step 7: Dip the Pops
Remove only two or three cheesecake pops from the freezer at a time.
Dip each pop into the melted white chocolate.
Rotate gently until fully coated.
Allow the excess chocolate to drip back into the bowl.
The cold cheesecake instantly begins setting the coating, which is one of the most satisfying parts of the recipe.
Step 8: Decorate Immediately
Before the chocolate hardens completely, sprinkle on your favorite toppings.
Try combinations like:
- Graham cracker crumbs with white chocolate drizzle
- Oreo crumbs with mini chocolate chips
- Rainbow sprinkles for birthdays
- Freeze-dried strawberries for a fruity finish
- Chopped roasted peanuts for extra crunch
Work quickly because the coating firms up within seconds.
Step 9: Freeze Again
Place the decorated pops back onto the parchment-lined tray.
Freeze for another 10 to 15 minutes.
This final chill ensures the coating is perfectly crisp.
Step 10: Enjoy
Serve directly from the freezer.
Let the pops sit at room temperature for about one minute before taking the first bite.
That tiny wait makes the cheesecake center even creamier.
Serving Suggestions for Frozen Cheesecake Pops
These Frozen Cheesecake Pops are delicious on their own, but pairing them with the right treats can make dessert feel even more special.
Here are some serving ideas:
| Pairing | Why It Works |
|---|---|
| Fresh strawberries | Bright, refreshing contrast |
| Blueberries | Adds natural sweetness |
| Raspberry sauce | Tangy fruit flavor |
| Chocolate drizzle | Extra indulgence |
| Caramel sauce | Rich buttery finish |
| Whipped cream | Light and fluffy topping |
| Fresh mint | Refreshing garnish |
| Cold coffee | Balances the sweetness |
| Iced latte | Perfect summer pairing |
| Hot espresso | Delicious flavor contrast |
For parties, arrange the pops upright in a decorative foam block covered with colorful tissue paper. It creates a beautiful dessert display that’s sure to impress your guests.
Expert Tips for Perfect Frozen Cheesecake Pops
After making these dozens of times, I’ve learned a few tricks that make all the difference.
Use Fully Softened Cream Cheese
Cold cream cheese creates lumps that never completely disappear.
Let it sit at room temperature for about 30 minutes before mixing.
Freeze Thoroughly
This is probably the biggest mistake beginners make.
If the cheesecake isn’t completely frozen, it may fall apart during dipping.
Be patient.
The results are worth it.
Melt Chocolate Slowly
White chocolate can become grainy if overheated.
Microwave in short bursts and stir frequently.
Work in Small Batches
Keep most of the cheesecake pops in the freezer while decorating.
Only remove a few at a time.
That way they stay nice and firm.
Decorate Quickly
The chocolate shell begins setting almost immediately.
Have all your toppings measured and ready before dipping.
Store Properly
Once frozen solid, transfer the pops into an airtight freezer-safe container.
Separate layers with parchment paper to prevent sticking.
Storage Instructions
Frozen Cheesecake Pops store beautifully.
| Storage Method | Time |
|---|---|
| Refrigerator | Not recommended for long storage |
| Freezer | Up to 2 months |
| Room Temperature | Serve within 10–15 minutes |
Always keep them in an airtight container to prevent freezer odors from affecting their flavor.
If stacking multiple layers, place parchment paper between each layer.
Never refreeze pops that have completely thawed.
General Information
| Detail | Information |
|---|---|
| Recipe Type | No-Bake Dessert |
| Cuisine | American |
| Skill Level | Beginner |
| Prep Time | 25 minutes |
| Freeze Time | 3 hours 15 minutes |
| Total Time | About 3 hours 40 minutes |
| Servings | 10 pops |
| Calories | 335 per serving |
Nutritional Information
Approximate nutrition per Frozen Cheesecake Pop.
| Nutrient | Amount |
|---|---|
| Calories | 335 |
| Protein | 4 g |
| Carbohydrates | 26 g |
| Fat | 24 g |
| Saturated Fat | 14 g |
| Fiber | 0 g |
| Sugar | 23 g |
| Sodium | 160 mg |
Nutritional values are estimates and may vary depending on the brands of ingredients used and the toppings you choose.
Frequently Asked Questions
Can I make Frozen Cheesecake Pops ahead of time?
Absolutely. They’re actually better when prepared a day or two in advance. Store them in the freezer until you’re ready to serve.
Can I use homemade whipped cream?
Yes. Freshly whipped heavy cream works wonderfully. Whip it to stiff peaks before gently folding it into the cheesecake mixture.
Why did my chocolate crack?
Chocolate usually cracks if it’s too thick or if the temperature difference between the chocolate and the frozen pops is extreme. Adding a little coconut oil helps create a smoother coating.
Can I use milk or dark chocolate instead of white chocolate?
Definitely. Milk chocolate, dark chocolate, and even ruby chocolate all work beautifully in this recipe.
Can I make these gluten-free?
Yes. Simply use certified gluten-free toppings and gluten-free cookie crumbs if desired.
Can I add fruit to the filling?
Yes, but use small amounts. Finely chopped strawberries, raspberries, or blueberries work well. Too much fresh fruit may make the filling softer.
How long do Frozen Cheesecake Pops last?
Stored correctly in an airtight container, they’ll stay fresh in the freezer for up to two months.
Final Thoughts
Frozen Cheesecake Pops prove that an impressive dessert doesn’t have to be complicated. With a creamy cheesecake center, a crisp white chocolate coating, and endless topping possibilities, they’re the kind of treat people remember long after the last bite.
Whether you’re making them for a birthday, a summer barbecue, or simply because you’re craving something sweet, these pops are guaranteed to bring smiles. They’re easy enough for beginners, fun enough for kids to help decorate, and elegant enough to serve at special occasions.
I hope this recipe becomes one of your freezer favorites, just as it has in my kitchen.
Print
Frozen Cheesecake Pops
- Total Time: 3 hours 40 mins
- Yield: 10 pops
- Diet: Vegetarian
Description
Creamy Frozen Cheesecake Pops coated in crisp white chocolate and decorated with your favorite toppings. These no-bake frozen treats are perfect for summer parties, birthdays, or anytime you crave an easy handheld dessert.
Ingredients
16 oz (450 g) cream cheese, softened
½ cup powdered sugar
1 tsp vanilla extract
1 cup whipped topping
1 tbsp fresh lemon juice (optional)
2 cups white chocolate chips
1 tbsp coconut oil
Graham cracker crumbs (optional)
Crushed Oreo cookies (optional)
Rainbow sprinkles (optional)
Chopped roasted peanuts (optional)
Freeze-dried strawberry crumbs (optional)
Mini chocolate chips (optional)
10 popsicle sticks
Instructions
1. Beat the softened cream cheese until smooth and fluffy.
2. Add the powdered sugar, vanilla extract, and lemon juice, then mix until fully combined.
3. Fold the whipped topping gently into the cheesecake mixture until light and creamy.
4. Divide the mixture into 10 equal portions and shape into thick oval or round pops.
5. Insert a popsicle stick into each pop and place on a parchment-lined tray.
6. Freeze for 2 to 3 hours until completely firm.
7. Melt the white chocolate chips with the coconut oil in 20-second microwave intervals, stirring until smooth.
8. Dip each frozen cheesecake pop into the melted white chocolate and let the excess drip off.
9. Immediately decorate with graham cracker crumbs, Oreo crumbs, sprinkles, peanuts, freeze-dried strawberries, or mini chocolate chips.
10. Freeze the coated pops for another 10 to 15 minutes until the chocolate sets.
11. Serve straight from the freezer and enjoy.
Notes
Freeze the cheesecake pops completely before dipping to prevent them from falling off the sticks.
Prepare all toppings before coating since the chocolate hardens quickly.
Store in an airtight container in the freezer for up to 2 months.
Try milk or dark chocolate instead of white chocolate for a delicious variation.
- Prep Time: 25 mins
- Cook Time: 0 mins
- Category: Dessert
- Method: No-Bake
- Cuisine: American